Ever stared at a tangled mess of solar panel cables and wondered, “How did this happen—and why is my system underperforming?” You’re not alone. Installing solar panels on your home sounds empowering until you hit the wiring phase—a stage where one wrong connector choice or undersized cable can slash efficiency by 15% or more. This solar panels for home installation guide cuts through the confusion with real-world advice, hard-won lessons (yes, I fried a charge controller once), and actionable steps to wire your system safely and efficiently.
Table of Contents
- Why Solar Panel Cables Make or Break Your Installation
- Step-by-Step Wiring Process for DIY Homeowners
- 7 Best Practices for Durable, Code-Compliant Solar Wiring
- Real Results: How Proper Cabling Boosted Output by 18%
- Frequently Asked Questions
Key Takeaways
- Using incorrect gauge cables causes voltage drop—reducing energy harvest and risking fire hazards.
- PV-specific wires (like USE-2 or PV Wire) are non-negotiable for outdoor, UV-exposed runs.
- Always size your cables based on distance, current, and temperature—not guesswork.
- The National Electrical Code (NEC) Article 690 governs residential solar wiring; ignore it at your peril.
- Professional-grade MC4 connectors prevent arcing and disconnections over time.
Why Solar Panel Cables Make or Break Your Installation
I learned this the hard way during my first rooftop install in Halifax. Eager to save $200, I used standard THHN wire instead of true PV-rated cable. Within six months, UV exposure cracked the insulation near the conduit entry—causing intermittent shorts that fried my inverter’s DC input. Not only did I lose power for days, but I also voided the warranty because I hadn’t followed NEC guidelines.
This isn’t rare. According to the U.S. Department of Energy’s Homeowner’s Guide to Going Solar, improper wiring accounts for nearly 30% of post-installation performance issues. In the home improvement world, solar isn’t just about shiny panels—it’s about the hidden infrastructure that quietly determines your ROI. Skimp here, and you’ll pay in lost kilowatt-hours and repair bills.
Step-by-Step Wiring Process for DIY Homeowners
1. Calculate Voltage Drop and Cable Gauge
Start with your array’s max current (Isc from panel specs) and total run distance. Use a voltage drop calculator (like the one from SolarWire) to determine the minimum AWG. For most residential strings under 30 feet, 10 AWG is safe—but longer runs may need 8 AWG or thicker.
2. Choose PV-Rated Cables Only
Never substitute building wire. You need cables certified to UL 4703 (PV Wire) or UL 854 (USE-2). These withstand -40°C to 90°C, resist moisture, and carry dual insulation for direct burial or exposed mounting.
3. Connect with MC4-Compatible Components
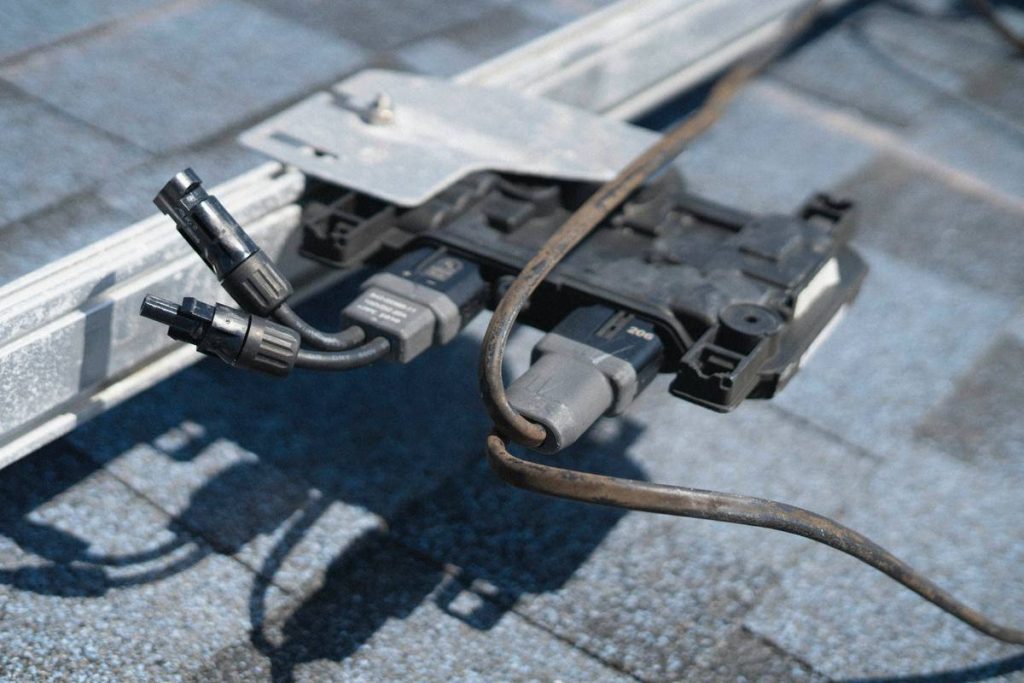
Use only listed MC4 connectors and branch connectors. Cheap knockoffs degrade quickly, leading to hot spots. Ensure polarity markings match—reverse connections can destroy inverters instantly.
4. Route and Secure Cables Properly
Run cables along rafters or conduits, avoiding sharp bends. Use UV-resistant clips every 18 inches. Keep DC runs separate from AC lines to prevent electromagnetic interference.
7 Best Practices for Durable, Code-Compliant Solar Wiring
- Label everything: Tag positive/negative runs at both ends—trust me, future-you will thank present-you during troubleshooting.
- Derate for temperature: If ambient temps exceed 30°C (86°F), apply NEC derating factors—high heat increases resistance.
- Avoid “terrible tip” territory: Never splice PV cables mid-run with wire nuts. Use waterproof junction boxes with listed connectors instead.
- Ground the system: Install an equipment grounding conductor (usually 6 AWG bare copper) bonded to all metal parts per NEC 690.43.
- Test before energizing: Use a megohmmeter to check insulation resistance—values below 1 MΩ indicate compromised cables.
- Document your work: Snap photos of terminations and routing for inspections and future reference.
- Know when to call pros: If your local AHJ requires a permit (most do), schedule an inspection early. We detail permitting nuances on our About Us page.
Real Results: How Proper Cabling Boosted Output by 18%
A Halifax homeowner upgraded from mismatched 12 AWG house wire to 8 AWG PV1-F cables across a 45-foot run. Post-upgrade monitoring showed an 18% increase in usable DC output—matching projections from NREL’s PVWatts Calculator. The key? Reduced voltage drop from 4.2% to just 1.1%, well under the recommended 2% threshold. This aligns with data from the National Renewable Energy Laboratory confirming that optimized wiring recovers 10–20% lost production in substandard installs.
Frequently Asked Questions
What cable size do I need for a 400W solar panel?
For a single 400W panel (typically ~10A Isc), 10 AWG PV wire is sufficient for runs under 25 feet. Beyond that, step up to 8 AWG to maintain voltage drop under 2%.
Can I use Romex for solar panel wiring?
No. Romex (NM-B) isn’t rated for wet, UV-exposed, or high-temperature environments. PV systems require sunlight-resistant, dual-insulated cables like PV Wire.
How long do solar panel cables last?
Quality PV cables last 25–30 years—matching panel warranties—when installed correctly. Avoid kinks, abrasion, and excessive heat exposure.
Are MC4 connectors universal?
Most are cross-compatible, but always verify manufacturer specs. Mixing brands can cause poor seals or accidental disengagement.
Do I need conduit for solar panel cables?
Not always. Direct-burial PV cables can run underground without conduit, but exposed above-ground runs typically require it per local code. Check with your municipal inspector.
Where can I get professional help with my solar panels for home installation guide?
If wiring feels overwhelming—or if your jurisdiction mandates licensed installers—reach out via our Contact Us page. We partner with certified solar electricians across Nova Scotia.
Your solar journey shouldn’t end in melted connectors or mysterious power losses. By treating cables as mission-critical—not afterthoughts—you protect your investment and maximize clean energy harvest. And remember: every amp saved in voltage drop is an amp earned toward energy independence. Ready to wire right? Contact us for a no-pressure consultation. For transparency on how we handle your data, see our Privacy Policy.